I buy and collect minibikes. 1/1/19. Email: cfh@provide.net
Overall Heathkit Boonie-Bike GT-18 Minibike History and Info.
-
Heathkit was located in Benton Harbor, Michigan. They came to be
after WW2 using surplus war supplies to make electronic kits,
which consumers could put togehter themselves. But in 1968 Heathkit
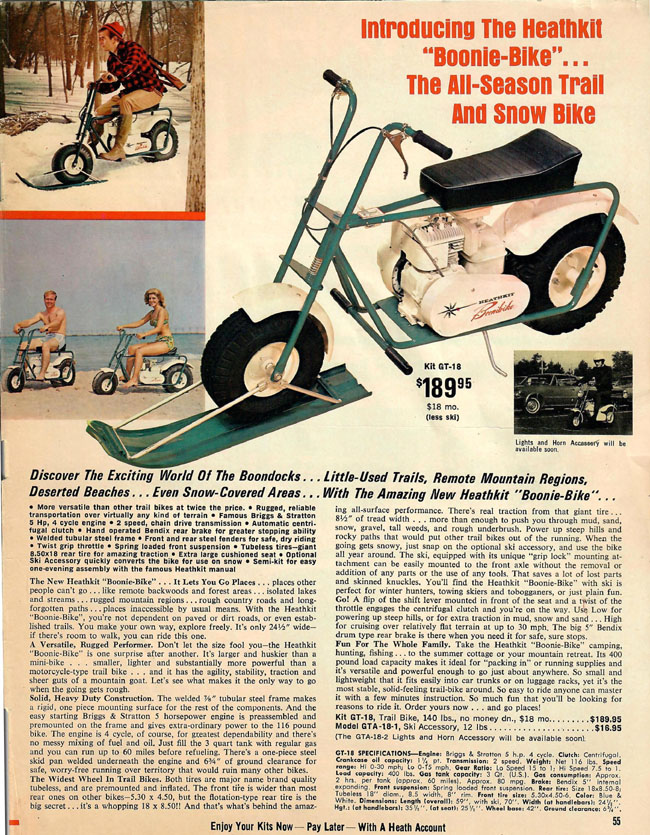
decide to enter the mini bike market with their GT-18 Boonie Bike model.
This mini bike was pretty cool, but only made in 1968 and 1969.
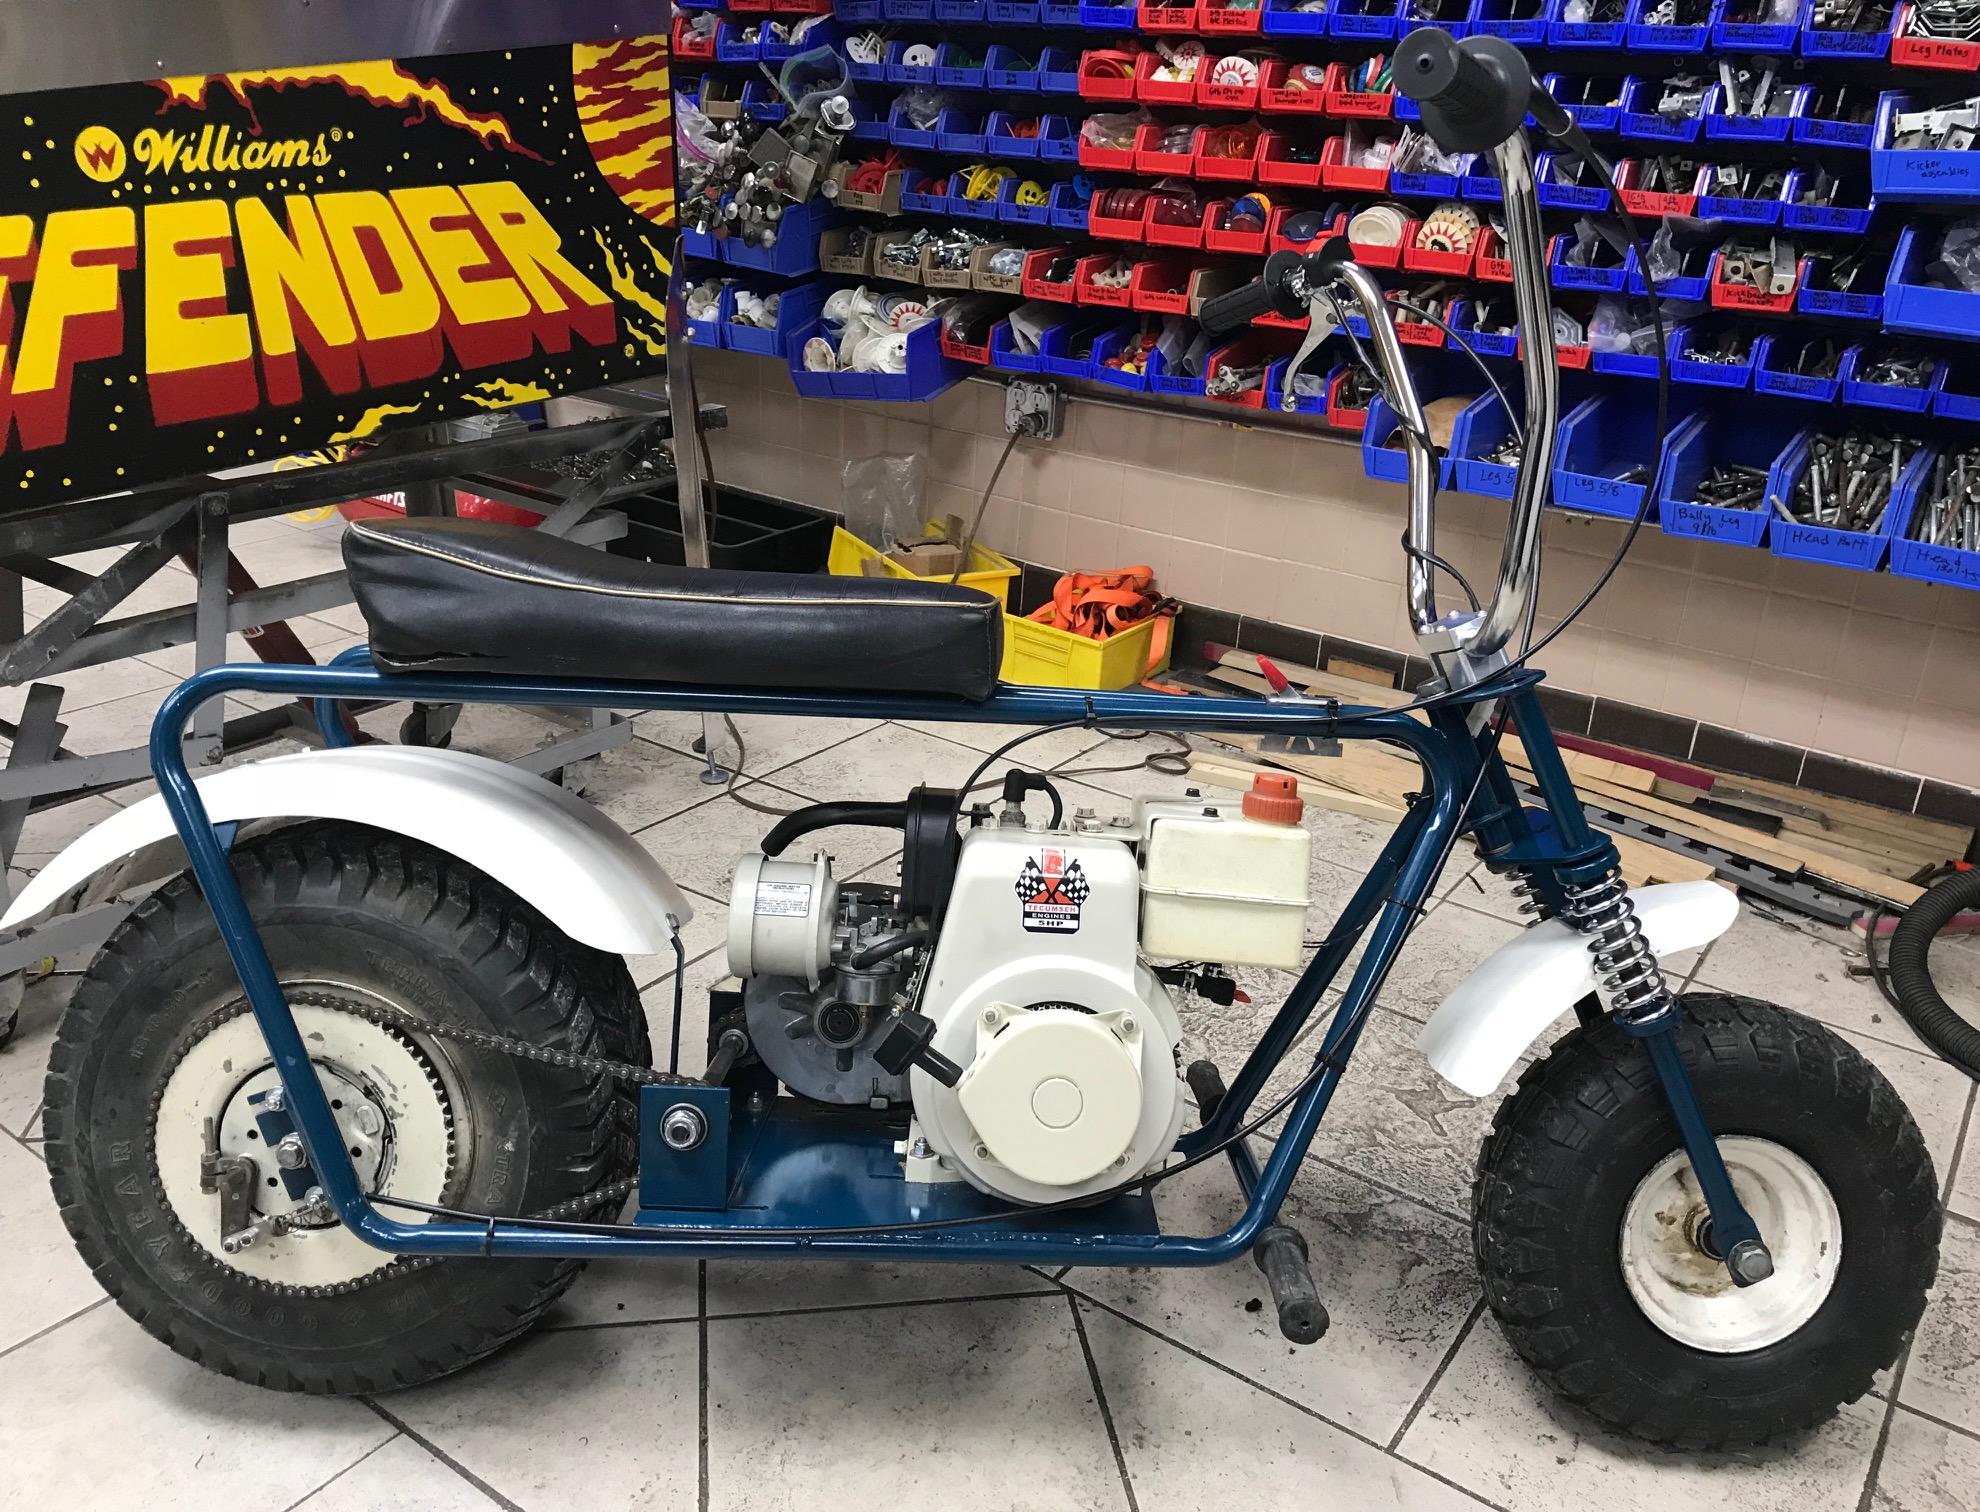
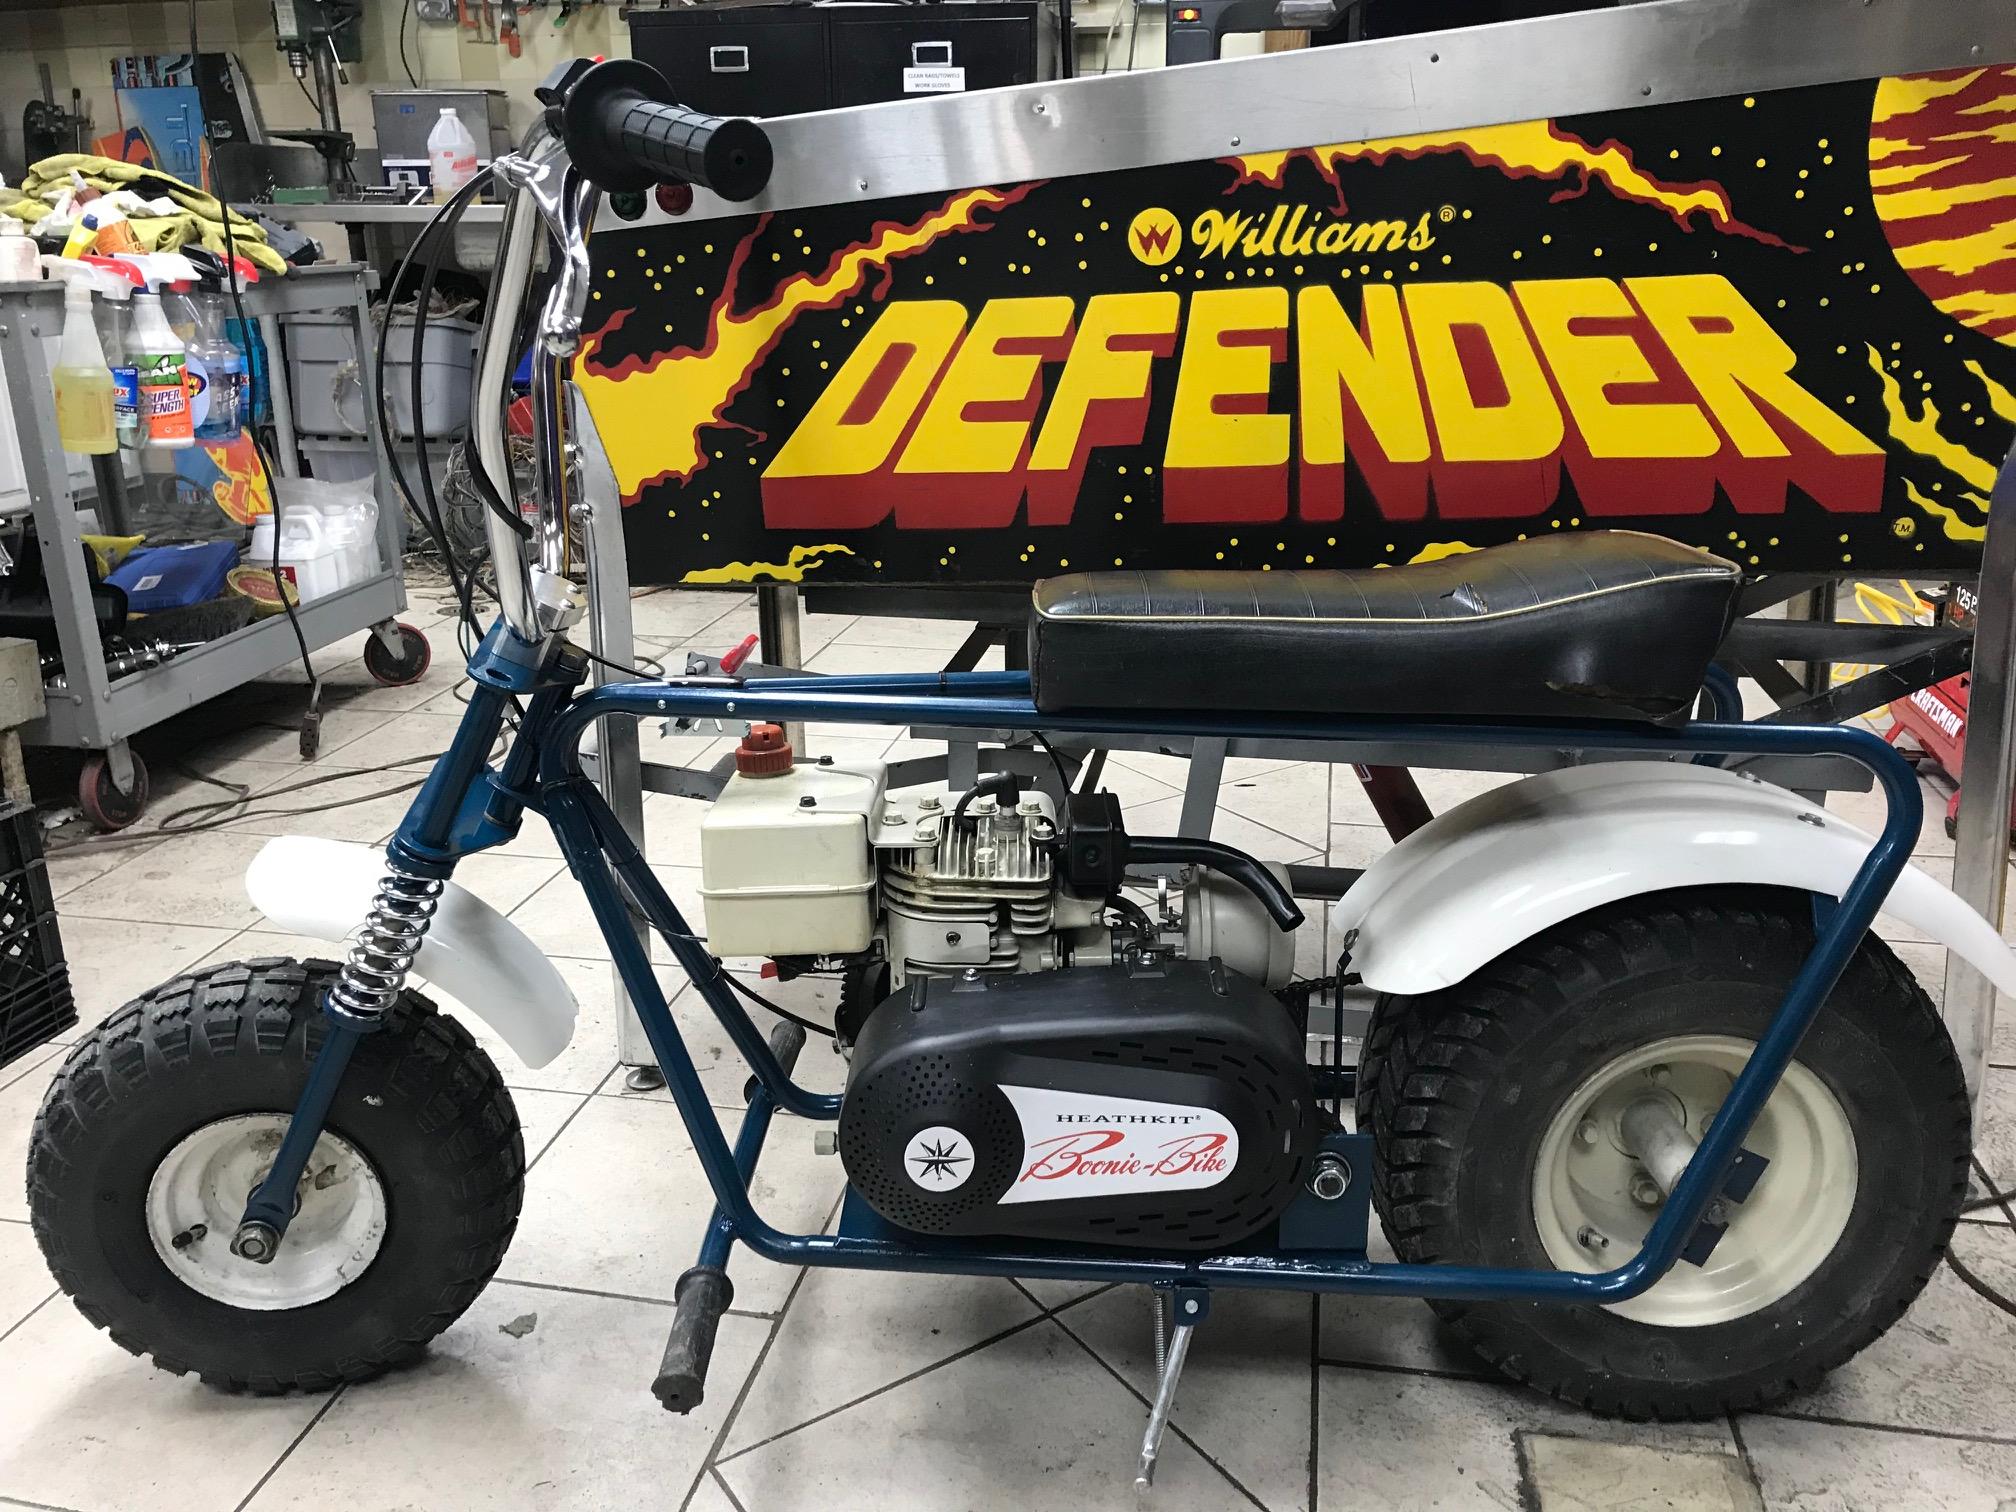
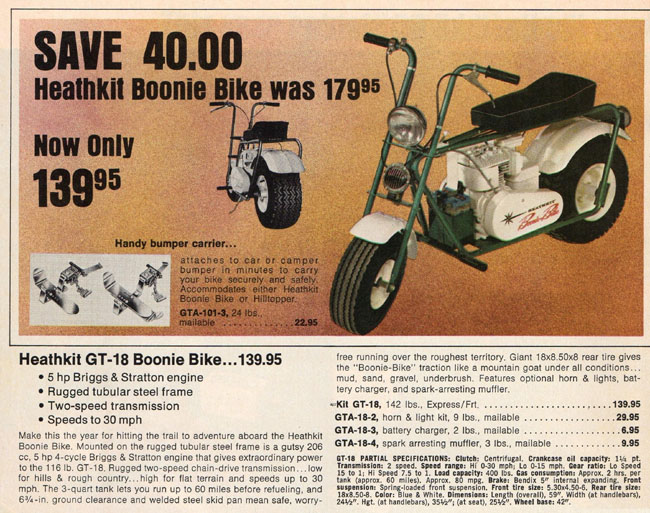
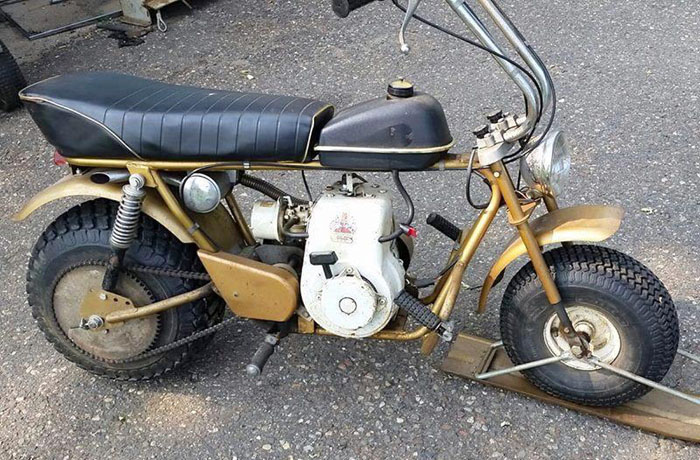
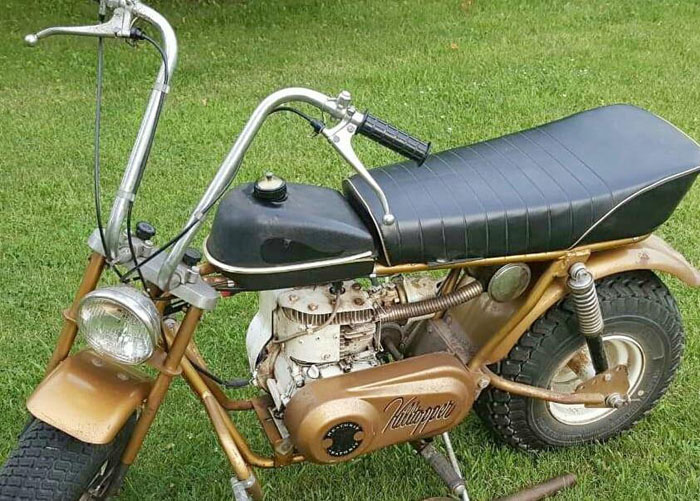
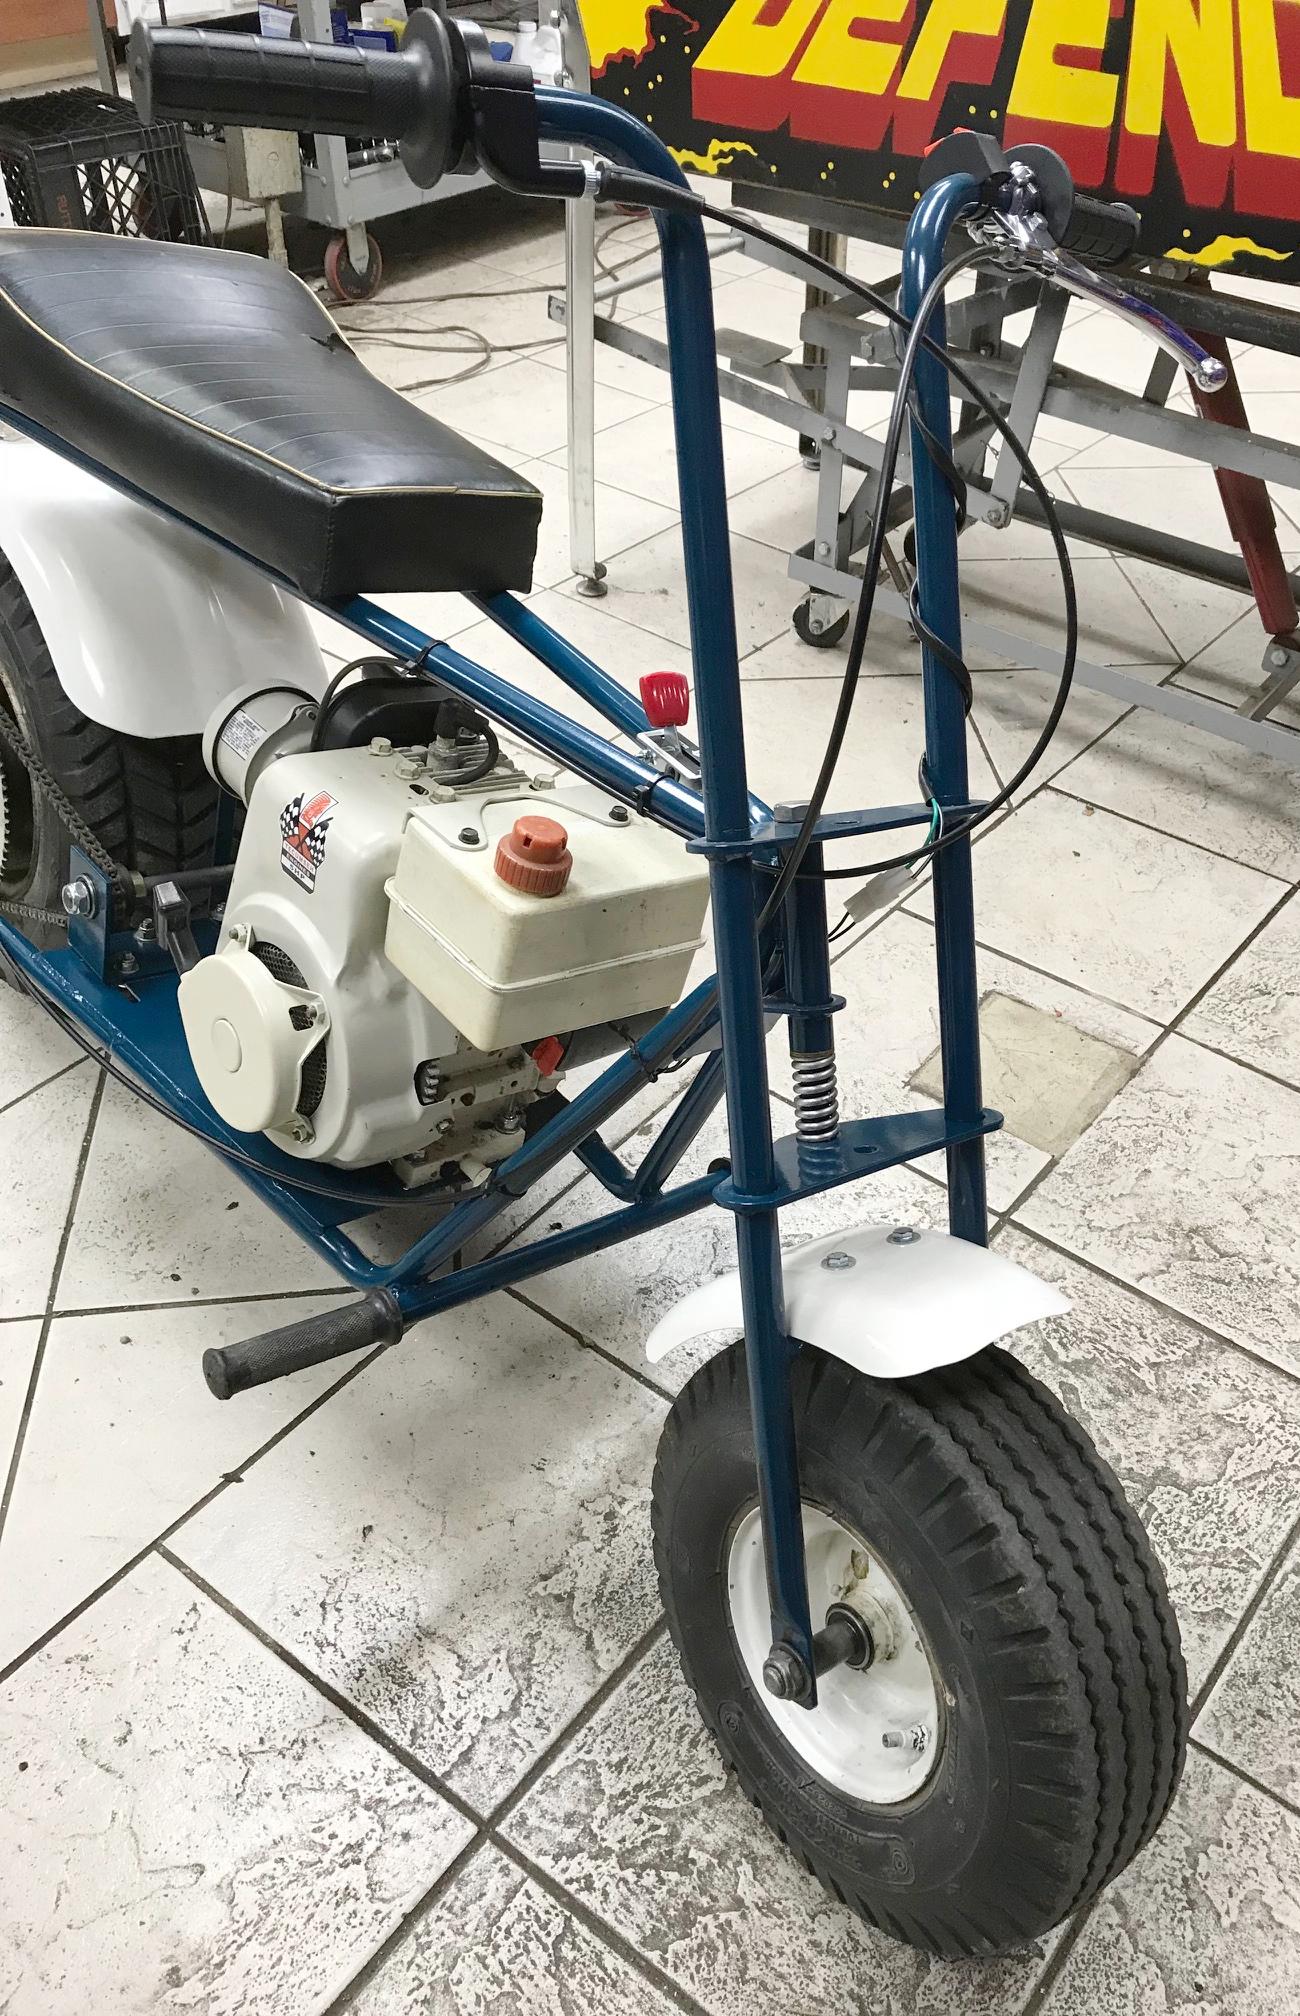
The Boonie Bike was a wide tire model, sold as being able to go any where. The rear tire was a huge 18x8.50x8" Goodyear tire, and the front was a more normal 5.30x4.50.6" Goodyear lawn tractor tire. The rear brake was a 5" Bendix drum model. The Boonie Bike effectively had no suspension. Well, the front triple tree had a small 3" spring. But I hardly consider that suspension (in the normal sense.) The color was a aqua blue/green with white metal fenders and white steel wheel rims. The seat had a silkscreen "Heathkit" logo on the back. The motor was a Briggs and Stratton 5hp engine.
-
The clutch was a unique 2-speed centrifical model, which fed to a jackshaft.
Just in front of the seat was a lawn tractor type speed control,
allowing the user to move from low to high gear. In low, the bike went 0-15 mph. In high, the speed was
0-30 mph. The centrifical clutch has two fixed gears and two sets of chains, which
ran to the jackshaft. Then the jackshaft had a spring system to accomodate which gear
was being utilized. It sounds like a neat set up, but in reality, was a bad concept. The problem was,
if the user tried to change gears when the bike was moving, the spring on the 2-speed jackshaft
mounted mechanism would snap. This leaves the bike in low gear, regardless of the position
of the speed control. During the 1970s Heathkit sold replacement gear springs, but eventually that
inventory depleated. Having a wide tire full size mini bike stuck in low gear and only
going to a top speed of 15 mph is not a good thing! That's why you see most Booniebikes
today with the 2-speed mechanism removed, and usually running a standard centrifical clutch.
-
By 1970 the Heathkit BooniBike was discontinued. But the good news is that
Heald (also located in Benton Harbor, Michigan) picked up the design and
started selling the Heald VT1 series mini bike. This was basically a copy of
the Heathkit Boonie Bike, at least that's how it started (and evolved).
The main difference between the VT1 and the GT18 was a metal plate on
the frame in front of the engine (kind of a front tire mud blocker.) Other
than that, they were identical.
-
Here's a Heathkit BooniBike
assembly instructions in PDF format from about 1972, from the Sincere's minibike service book.
Then in 1971 Heathkit came out with a new bike called the Heathkit Hilltopper. It's a full suspension upgrade of the original Booniebike. If anyone has one of these for sale please contact me!
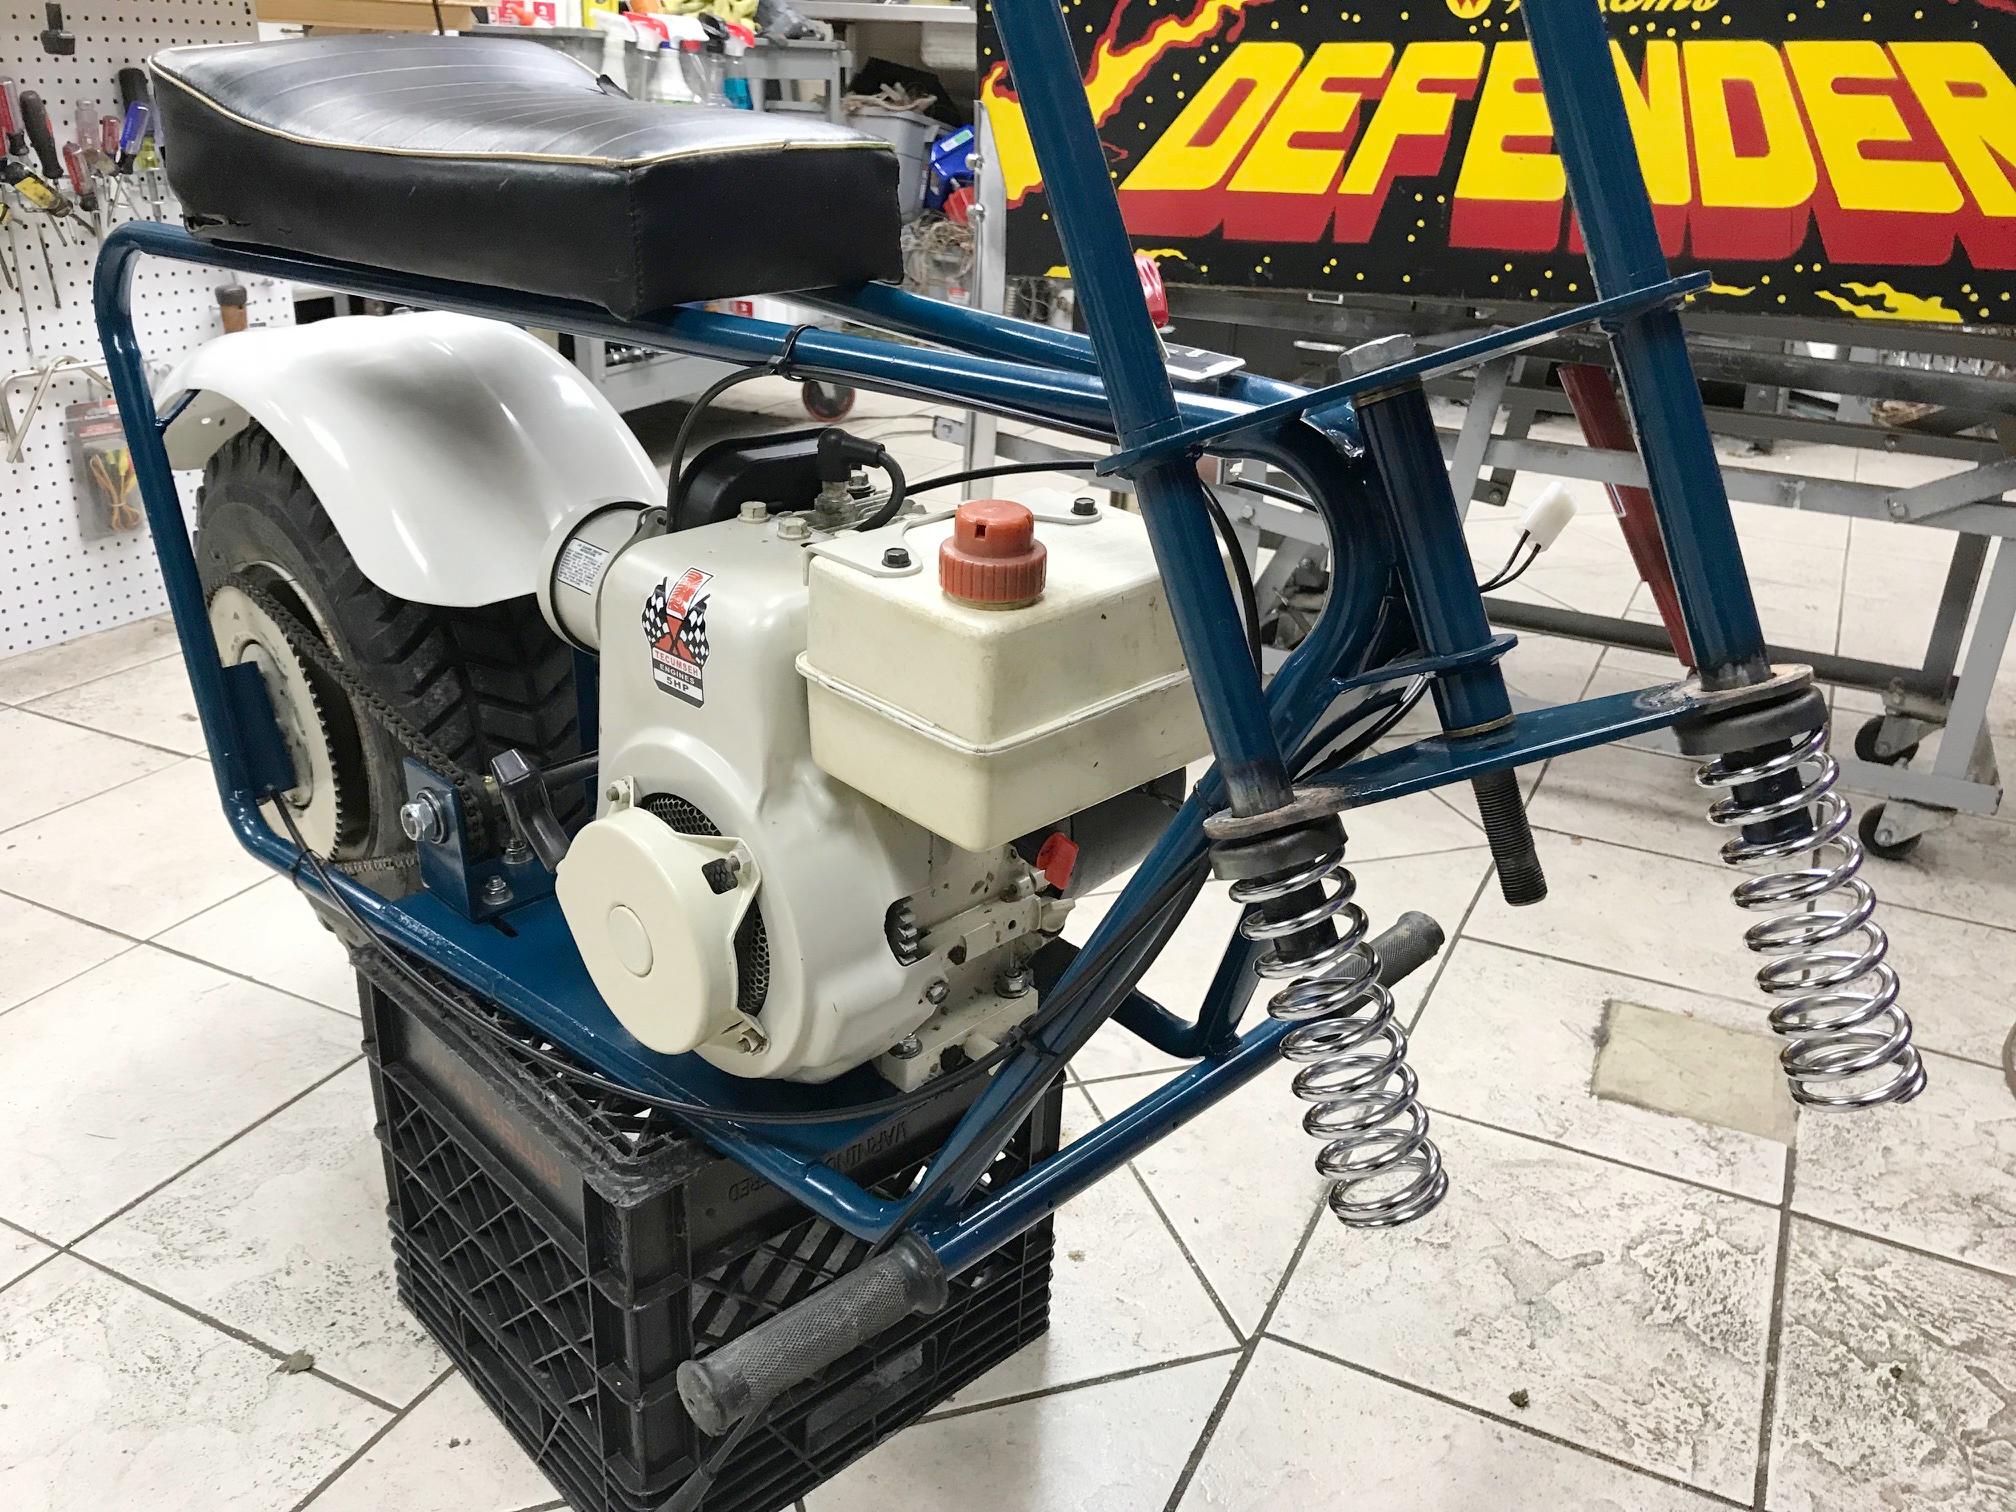
Adding Springer Front Forks to the Heathkit Boonie Bike.
-
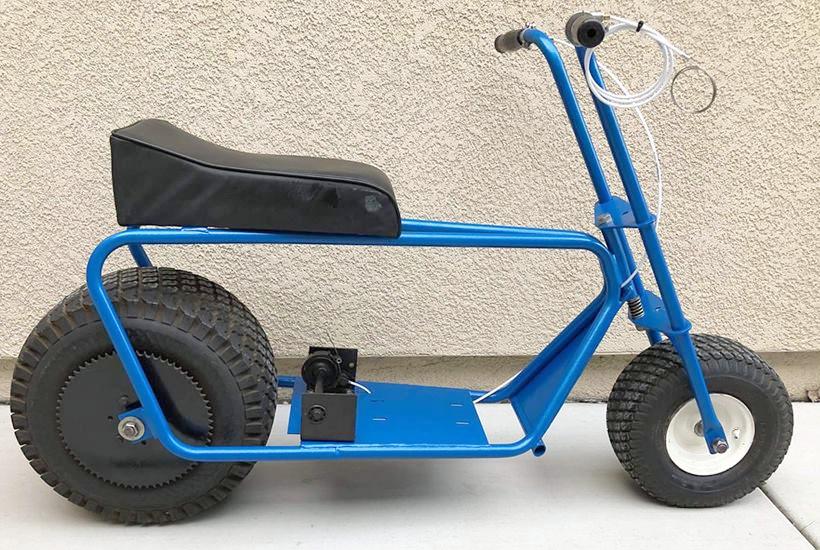
One of the things I don't like about the Heathkit GT18 is the lack of
any suspension. Though there is kind of a stock front suspension,
frankly it's useless. Fortunately it is easy to add a springer front
end to the Heathkit Boonie Bike. Also this procedure will make the
Heathkit GT18 handle better. The small 6" front wheel that uses a
lawn mower tire makes the minibike handle like crap. Adding the springer
front end will lift the front 2", which increases the rake. This helps
handling. Also changing to a rounded edge front tire really helps too.
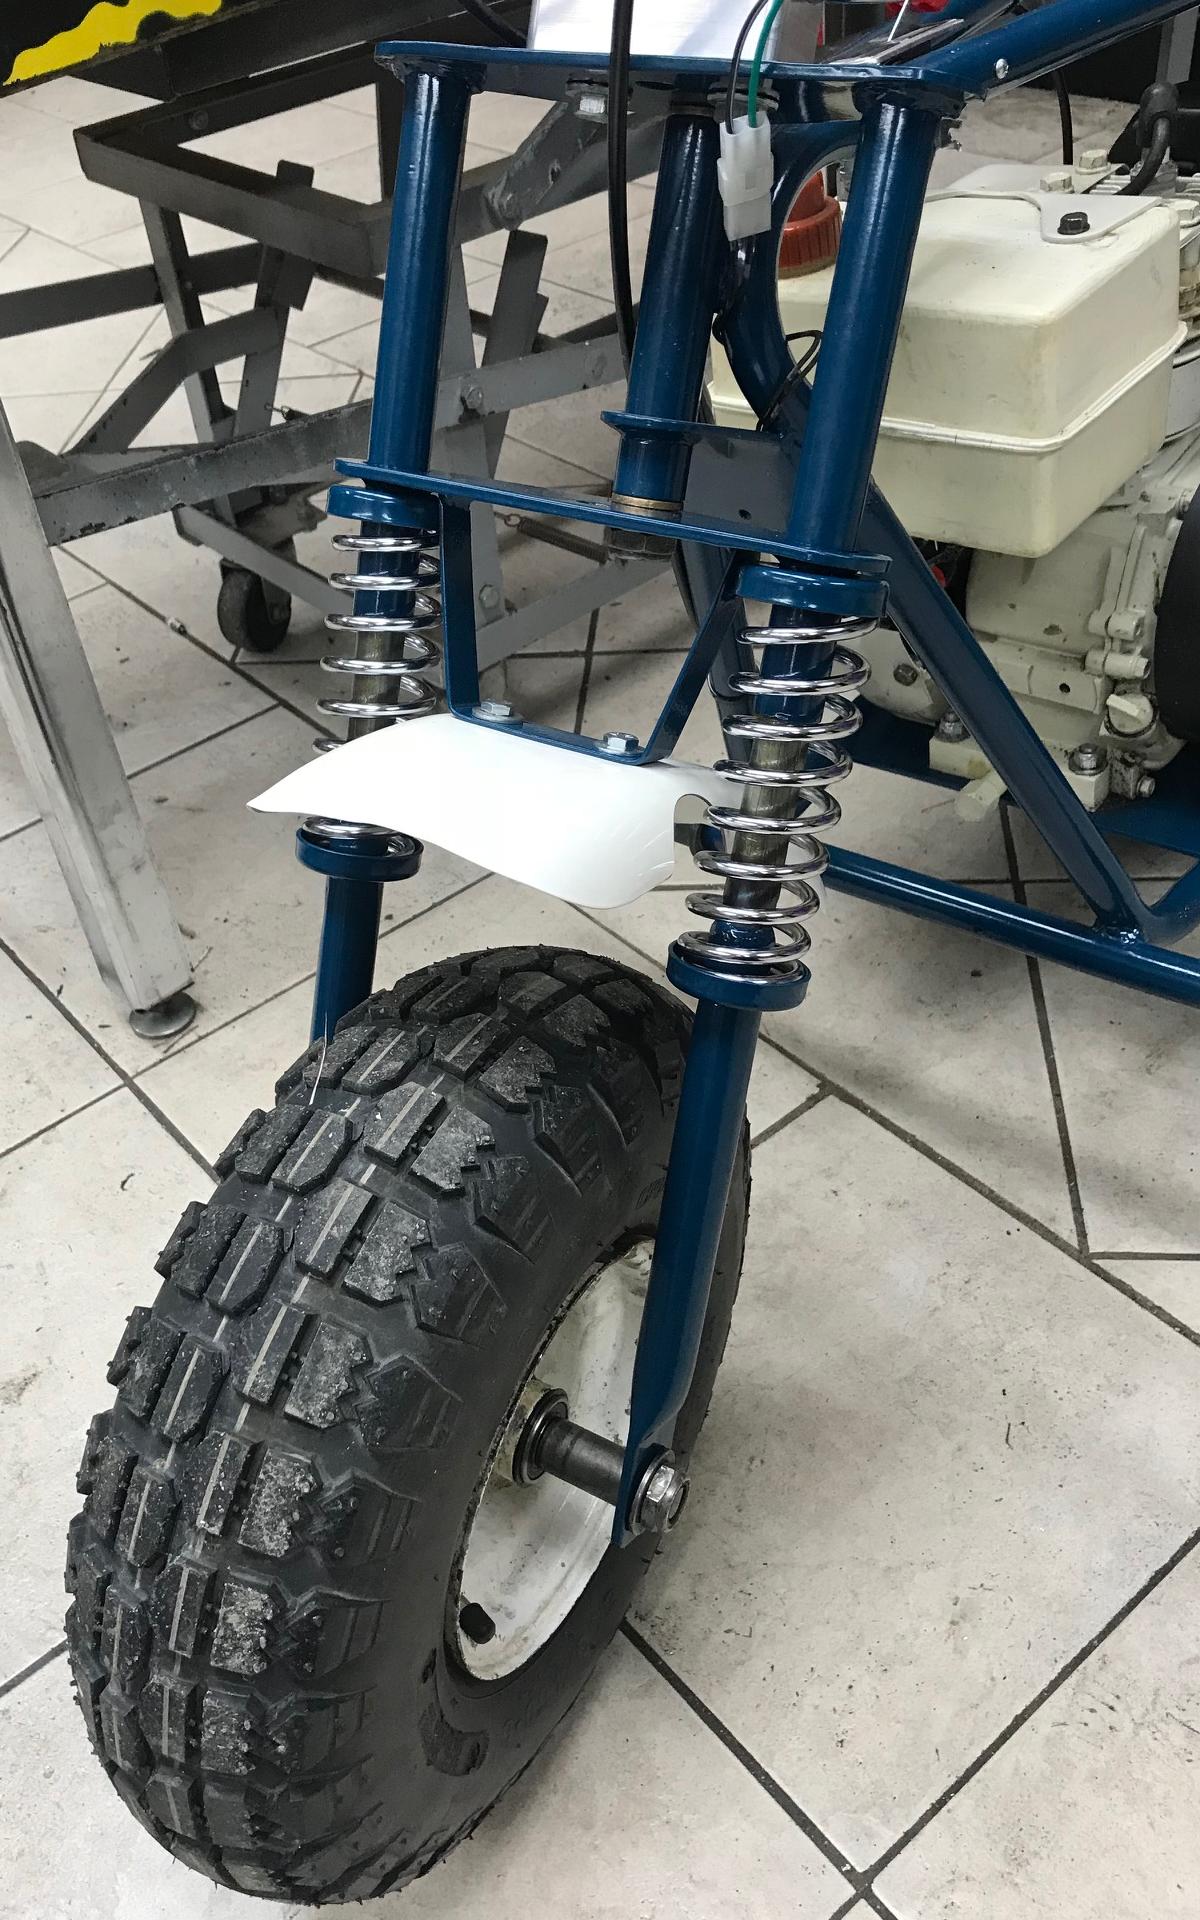
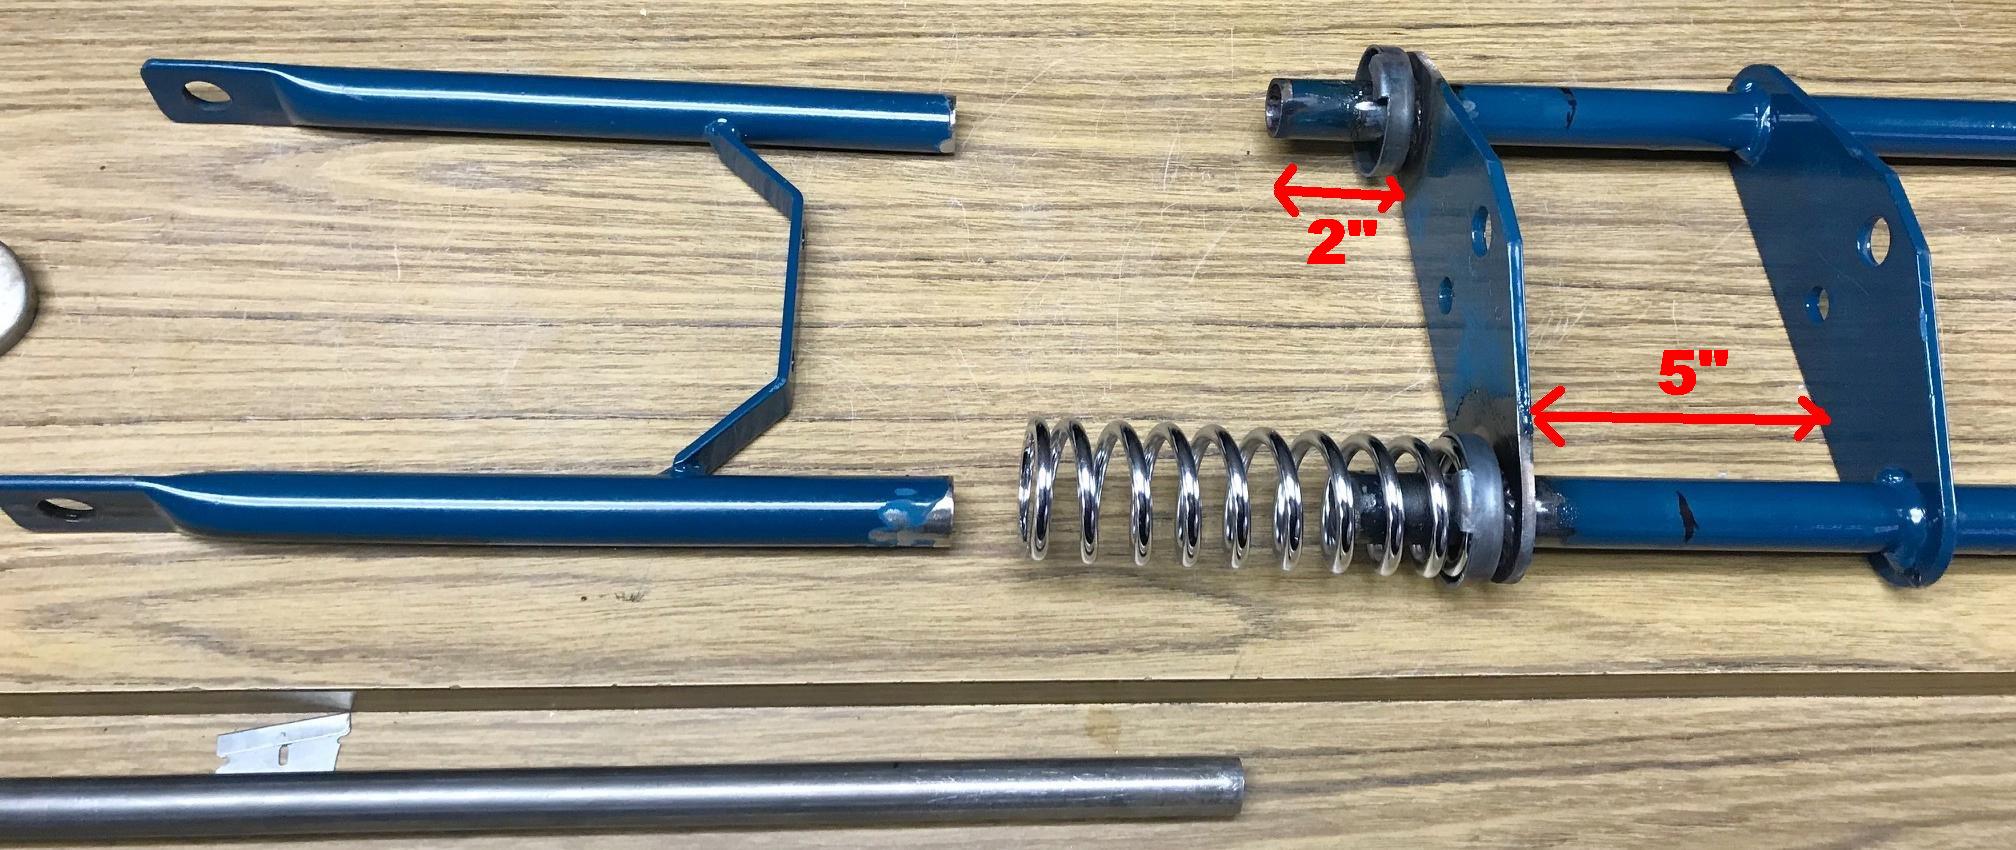
You will need some parts. OMB warehouse sells a front fork spring and cup kit, you will need that. You will also need two 13" sections of 11/16" solid steel rod. The original front end will need to be cut at 2" below the lower fork triangle. And the lower sections shortened to 7" long. Note these lengths will make the front end rise up an inch or two. This increases fork rake slightly, and makes the bike handle better. Also the front fender mount must be cut off the front fork.....

-
First we have to abandon the single fork tube spring, and move the lower tree plate.
The measurement of the neck tube is 5" long, plus a 2" center spring.
Meaning the distance between the top and lower triple tree plates is 7".
This needs to be reduced to 5". But we also want a 2" tube extend beyond the lower plate.
So this works out really well. Just use a Mataba saw and cut the fork tube,
right through the lower plate welds. With just a bit of additional grinding,
the lower triple tree plate is loose, and can be moved to a 5" inside distance.
Then it can be re-welded (and spring cups added.)
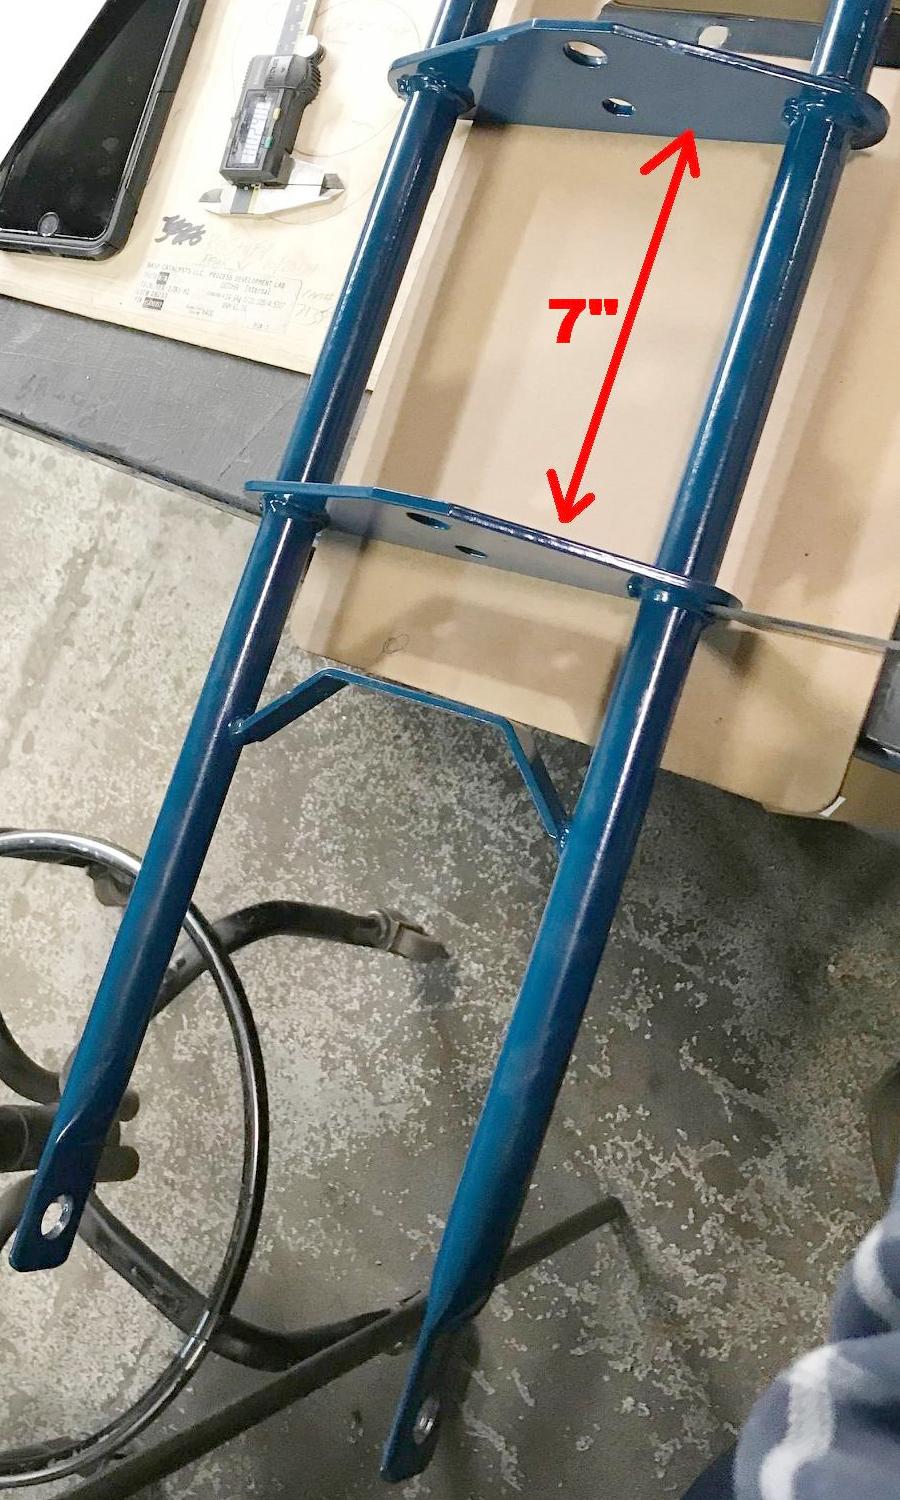
Measurements used to cut the front fork. The main part is the triple tree has
to shrink from 7" inside measurement to 5". This is done by sliding the bottom
triangle of the triple tree up 2". This gives a nice 2" area for the spring cups
to be welded.
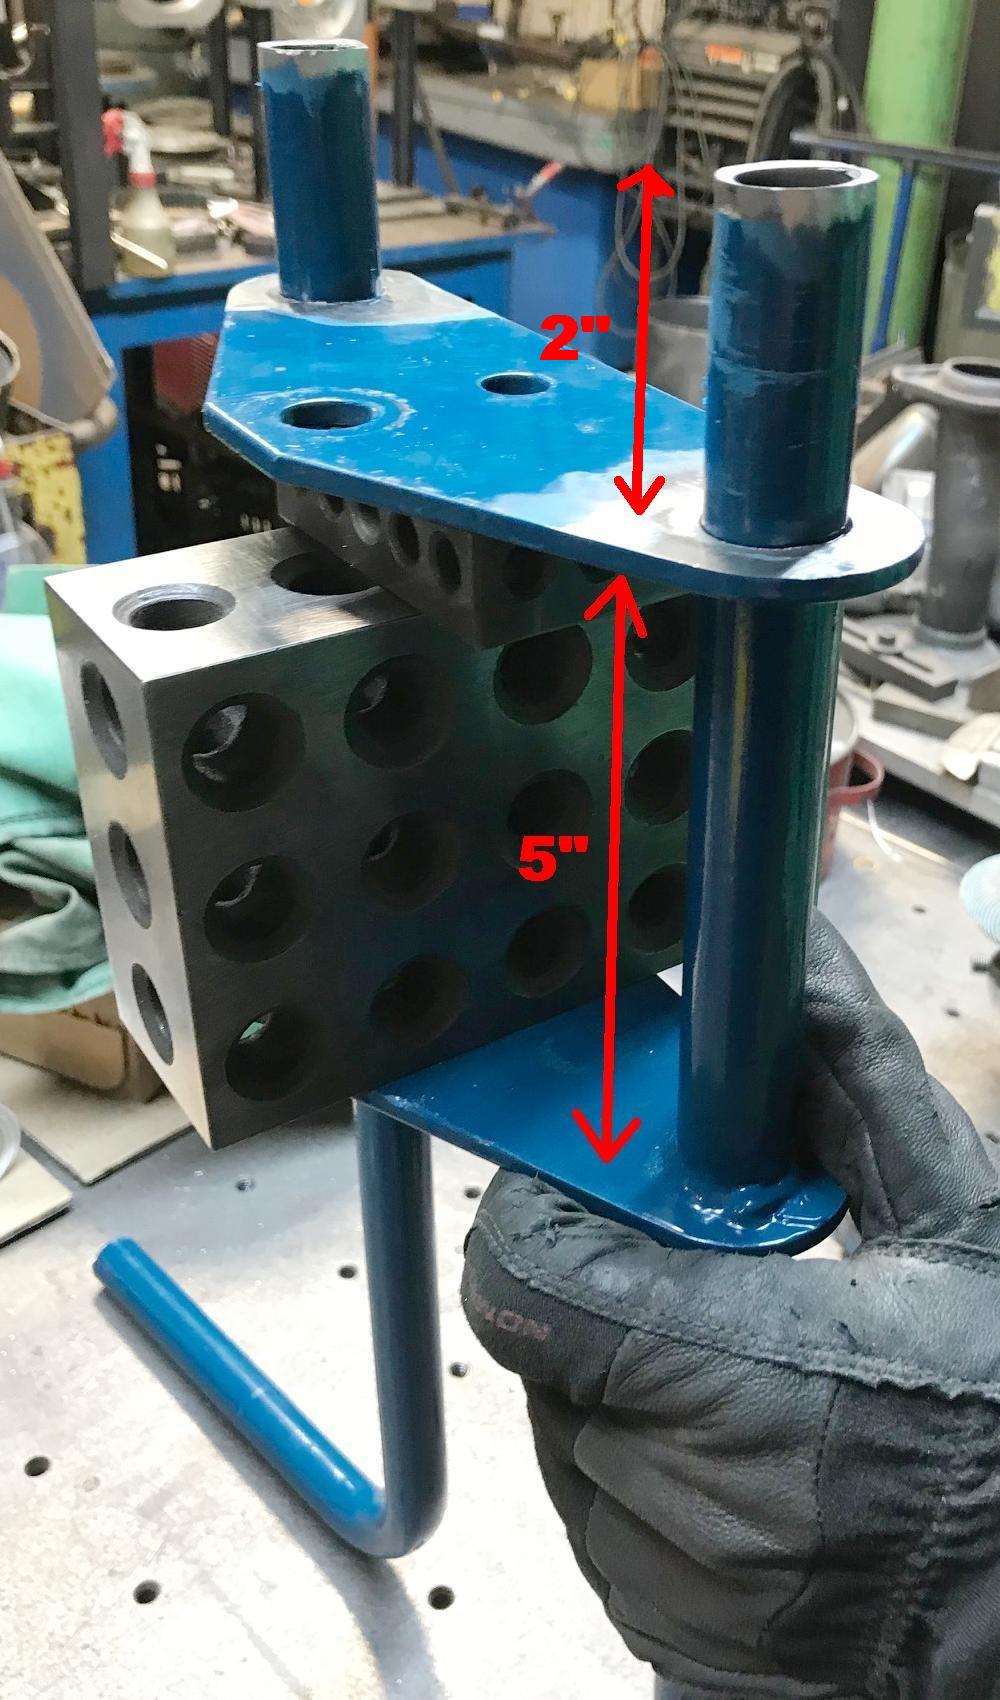
Here's the modified front triple tree installed without the center 2" spring.
Fits really nice! The springer cups have been welded into place too.
-
Next the lower fork tubes (which were cut off above) have to have the
fender bracket removed. This makes the two tube "loose". Now they have to
be cut. From the bottom of the front tubes to the bottom of the lower
springer cup needs to be 9" (the tubes need to be 9" long).
Then two 11/16" round solid bars, 13" in length, are pressed into
the 9" lower fork tubes. The lower spring cups can now be welded into place
on the lower fork tube. In addition, the front fender bracket can be
re-formed and welded to the bottom of the triple tree plate (with the
front fender now 3" below the triple tree.)